HOW I RAISED THE PRESSURE, LET OFF STEAM AND FELL IN LOVE WITH A KITCHEN APPLIANCE
STORY BY Martha Thomas
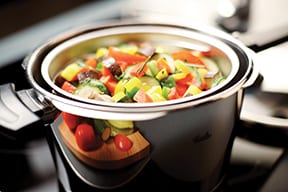
I have to admit, I’m smitten. The box arrived last winter, sometime after I’d completed an article for a local newspaper about slow cookers. “Please try our appliance,” the note said. I pulled out a gleaming pot with a heavy lid and a recipe book filled with things like minestrone soup, pulled pork and risotto, with the promise that most would take no longer than 30 minutes to prepare, start to finish.
Ok, I thought: I can do this. Thus began my affair with the pressure cooker, a mad romance that embraced mussels with garlic and wine, meatballs simmered in tomato sauce, chicken with rice, chicken with root vegetables, risotto laced with peas and shrimp, chickpeas with lemons and even a chocolate soufflé, made by lowering the entire soufflé dish into the cooker with an aluminum foil sling, turning up the heat and hovering in anticipation of the sounds of shattered glass from within (it didn’t happen).
Like many in my generation, I grew up with a pressure cooker horror story lurking in my family lore. Aunt Agnes (not her real name), we’d learned at an early age, had suffered serious burns after a cooker exploded near her face. As Lars Liebisch, official chef for Fissler USA, which distributes the German-made pressure cookers, says, “Modern pressure cookers can’t explode.”
They’re designed with safety features that prevent the lid from being removed until every last drop of steam has been released. Julia Collin Davison, executive food editor for America’s Test Kitchen (ATK), publishers of “Cook’s Illustrated,” says, the safety issue “was a hurdle” when the company began working on its book “Pressure Cooker Perfection” (America’s Test Kitchen, 2013). Along with endorsements like “Food cooks quickly” and “Flavors are supercharged,” the book cover reads: “No pea soup on the ceiling. We promise.”
The mother of a 4-year-old, Davison says she makes a lot of mac n’ cheese in the pressure cooker, a recipe that takes about five minutes (with the milk added after the noodles are cooked), and the household favorite is beef short ribs, which requires minimal prep work and cooks under pressure for 35 minutes. Davison’s favorite recipe may be the Farmhouse Chicken Noodle Soup for its simplicity. “A whole chicken, 20 minutes, at the end the meat is falling off the bones,” she says. Plus, chicken stock that tastes “clean, intense and complex in all the right ways.” The pressure, says Davison, “seems to pull flavor out of the bones.”
 My loaner pot was from Fissler, expensive (the 4.8 liter model I had sells for $240 on the Fissler USA site), but the highest rated, according to Davison, who tried many brands – both stovetop and electric – in the course of researching her book. Davison prefers the stovetop models, as electric pressure cookers “can be finicky.”
During one stressful week last spring, I came home each night to my cooker with the idea of adding a bit more pressure to my day before letting off steam and sitting down to a good meal. The results were gratifying. It was a period when the temptation for carryout food or frozen pizza could easily be at its zenith. Having this appliance in my life – with a mandate to test it – meant that my daughter, Mary, and I had healthy meals with plenty of delicious leftovers.
The chicken came out succulent, risotto took six minutes, and chickpeas in the pressure cooker were a completely different legume from those in a can, buttery and creamy. One evening I made turkey
meatballs, simmered in tomato sauce from the previous summer’s canning. They were tasty, yes. And all of a sudden I’ve forgotten how to make meatballs any other way.
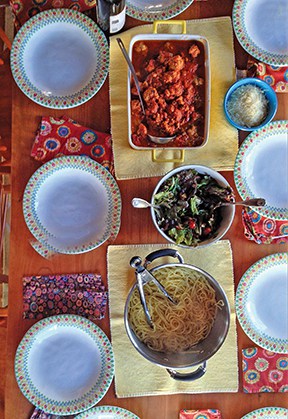
Later in the summer, I entertained some cousins during a family vacation in Maine. Don’t worry, I said, when they asked what they could bring for dinner. I’m going to make spaghetti and meatballs. While my cousins – and our mothers – sat on the porch discussing poor Aunt Agnes’ (not her real name) terrible accident, Mary and I were busy in the kitchen – grating cheese, chopping parsley and rolling the meat mixture (we used lamb and beef) into hearty spheres, carefully setting each one into the tomato sauce that had already started to simmer in the cooker. We put on a pot of spaghetti and cranked up the heat under the cooker. I had been concerned that the ceramic cooktop in the cottage might affect the timing, but it worked beautifully. (Lars Liebisch later told me that in Europe, the radiant ceramic is widely considered to be more accurate when it comes to heat control.)
The meatballs were ready in five minutes. That’s right, five. We tossed the salad, called our guests to the table and settled down to a completely pressure-free meal.*
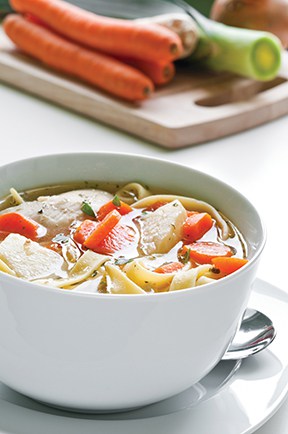
With its velvety broth and deep flavor, oldfashioned chicken noodle soup is an ideal pressure cooker candidate since the pressure cooker can extract flavor from the meat, skin and bones of a whole chicken in just 20 minutes. We started by putting the chicken into the pot with some aromatics, carrots, celery and water. Placing the chicken in the pot breast side up allowed the thighs and more delicate breast meat to cook through at the same time since the thighs were in contact with the pot’s bottom. After 20 minutes, the meat practically fell off the bones, making it easy to shred and stir back in. Soy sauce gave the broth even deeper, richer meaty flavor. To keep things simple, we cooked the noodles in the broth while we shredded the chicken.
- 1 tablespoon vegetable oil
- 1 onion, chopped fine
- 3 garlic cloves, minced
- 1 teaspoon minced fresh thyme or 1/4 teaspoon dried
- 8 cups water
- 4 carrots, peeled and sliced 1/2 inch thick
- 2 celery ribs, sliced 1/2 inch thick
- 2 tablespoons soy sauce
- 1 (4‑pound) whole chicken, giblets discarded
- salt and pepper
- 4 ounces (2 2/3 cups) wide egg noodles
- 1/4 cup minced fresh parsley
1. Build flavor: Heat oil in pressure cooker pot over medium heat until shimmering. Add onion and cook until softened, about 5 minutes. Stir in garlic and thyme and cook until fragrant, about 30 seconds. Stir in water, carrots, celery and soy sauce, scraping up any browned bits. Season chicken with salt and pepper and place, breast side up, in pot.
2. High pressure for 20 minutes: Lock pressure cooker lid in place and bring to high pressure over medium-high heat. As soon as pot reaches high pressure, reduce heat to medium-low and cook for 20 minutes, adjusting heat as needed to maintain high pressure.
3. Quick release pressure: Remove pot from heat. Quick release pressure, then carefully remove lid, allowing steam to escape away from you.
4. Before serving: Transfer chicken to cutting board, let cool slightly, then shred meat into bite-size pieces, discarding skin and bones. Meanwhile, using large spoon, skim excess fat from surface of soup. Bring soup to boil, stir in noodles, and cook until tender, about 5 minutes. Stir in shredded chicken and parsley, season with salt and pepper to taste, and serve. Serves 8 and creamy.
One evening I made turkey meatballs, simmered in tomato sauce from the previous summer’s canning. They were tasty, yes. And all of a sudden I’ve forgotten how to make meatballs any other way. Later in the summer, I entertained some cousins during a family vacation in Maine. Don’t worry, I said, when they asked what they could bring for dinner. I’m going to make spaghetti and meatballs. While my cousins – and our mothers – sat on the porch discussing poor Aunt Agnes’ (not her real name) terrible accident, Mary and I were busy in the kitchen – grating cheese, chopping parsley and rolling the meat mixture (we used lamb and beef) into hearty spheres, carefully setting each one into the tomato sauce that had already started to simmer in the cooker. We put on a pot of spaghetti and cranked up the heat under the cooker. I had been concerned that the ceramic cooktop in the cottage might affect the timing, but it worked beautifully. (Lars Liebisch later told me that in Europe, the radiant ceramic is widely considered to be more accurate when it comes to heat control.) The meatballs were ready in five minutes. That’s right, five. We tossed the salad, called our guests to the table and settled down to a completely pressure-free meal.*
Macaroni and Cheese
For mac and cheese, you’re usually stuck with two options: the stuff from the box, which is fast but tastes pasty and artificial, or the lusciously cheesy casserole style that requires multiple steps of building the sauce, boiling the pasta, then marrying the two and baking it all together. With our pressure cooker, we discovered we could have from-scratch mac and cheese ready in 20 minutes, and it could all be done in a single pot. We combined macaroni, water, salt, dry mustard and cayenne and cooked it under pressure for 5 minutes. Since the dairy curdled when cooked under pressure, we waited to add it until after we released the pressure. Evaporated milk thickened the sauce, and a combination of cheddar and Monterey Jack, stirred in a few handfuls at a time, melted perfectly for a flavorful, supercheesy mac and cheese.
- 8 ounces (2 cups) elbow macaroni
- 2 cups water
- salt and pepper
- 1 teaspoon dry mustard
- pinch cayenne pepper
- 1 (12‑ounce) can evaporated milk
- 4 ounces sharp cheddar cheese, shredded (1 cup)
- 4 ounces Monterey Jack cheese, shredded (1 cup)
1. High pressure for 5 minutes: Mix macaroni, water, 1 teaspoon salt, mustard and cayenne together in pressure cooker pot. Lock pressure cooker lid in place and bring to high pressure over medium-high heat. As soon as pot reaches high pressure, reduce heat to medium-low and cook for 5 minutes, adjusting heat as needed to maintain high pressure.
2. Quick release pressure: Remove pot from heat. Quick release pressure, then carefully remove lid, allowing steam to escape away from you.
3. Before serving: Stir in evaporated milk and simmer over mediumhigh heat until sauce has thickened and pasta is tender, 1 to 3 minutes. Off heat, stir in cheddar and Monterey Jack cheeses, a handful at a time, until cheese has melted and sauce is smooth. Season with salt and pepper to taste.
Serve. Serves 4 Recipe from “Pressure Cooker Perfection” published by America’s Test Kitchen
Meatballs and Marinara
The key to cooking meatballs in a pressure cooker is making them sturdy so that they don’t break or turn mushy. Starting with meatloaf mix, we tested using various proportions of milk (for moisture) and bread crumbs (for binding power) until we got the texture just right. We found these meatballs needed half the milk and bread crumbs you find in a traditional recipe, and using flaky panko bread crumbs worked best. As for the marinara, we kept the ingredients simple, with onion, crushed tomatoes, oregano, garlic and red pepper flakes. Cooking the meatballs in the sauce brought all the flavors together. n 2 tablespoons olive oil
- 1 onion, minced
- salt and pepper
- 2 tablespoons minced fresh oregano or 2 teaspoons dried
- 1/4 teaspoon red pepper flakes
- 6 garlic cloves, minced
- 2 (28‑ounce) cans crushed tomatoes
- sugar
- 1/2 cup panko bread crumbs
- 1/4 cup whole milk
- 1 pound meatloaf mix
- 1 ounce Parmesan cheese, grated (1/2 cup)
- 3 tablespoons minced fresh parsley
- 1 large egg, lightly beaten
- 1/4 cup chopped fresh basil
1. Build flavor: Heat oil in pressure cooker pot over medium high heat until shimmering. Add onion and 1/4 teaspoon salt and cook until softened, about 5 minutes. Stir in oregano, red pepper flakes and twothirds of garlic and cook until fragrant, about 30 seconds. Stir in crushed tomatoes, scraping up any browned bits. Reduce heat to medium-low and simmer gently, stirring occasionally, until tomatoes no longer taste raw, about 10 minutes. Season with sugar, salt and pepper to taste.
2. Meanwhile, mash panko and milk into paste in medium bowl with fork. Gently mix in meatloaf mix, Parmesan, parsley, egg, remaining garlic, 3/4 teaspoon salt and 1/2 teaspoon pepper with hands until thoroughly combined. Shape mixture into 12 even-size meatballs. Gently nestle meatballs into sauce.
3. High pressure for 5 minutes: Lock pressure cooker lid in place and bring to high pressure over medium-high heat. As soon as pot reaches high pressure, reduce heat to medium-low and cook for 5 minutes, adjusting heat as needed to maintain high pressure.
4. Quick release pressure: Remove pot from heat. Quick release pressure, then carefully remove lid, allowing steam to escape away from you.
5. Before serving: Stir in basil and season with additional sugar, salt and pepper to taste. Serve.
Makes 4 cups; enough for 1 pound pasta Recipe from “Pressure Cooker Perfection” published by America’s Test Kitchen
PRESSURE COOKER TIPS
- Get acquainted with your pressure cooker – it’s helpful to know the cook times of certain foods. This will alter based on the size of your cooker. Likewise, know your stove. A gas flame will heat differently than an electric coil.
- Do not overfill. This can lead to undercooking, liquid absorption and burning. Follow the recipe specified for the size of your pressure cooker.
- Give the heat inside a head start before securing the lid. Pressure will build faster if the contents in the pot are already hot.
- Use the release method indicated in the recipe. The quick release or slow (“natural”) release can affect the outcome of your dish.
- While current pressure cookers are designed with safety in mind – you can’t even open them if there’s still pressure inside – the contents, which have just been cooking at up to 250 degrees, are hot. Open the lid away from your face!


