JULES SHEPARD’S CELIAC DIAGNOSIS HASN’T KEPT HER FROM BAKING – AND EATING – THE FOODS SHE LOVES
STORY BY Martha Thomas PHOTOGRAPHY BY Jeff Rasmussen
If Jules Shepard had attended business school 20 years ago and had been tasked with setting up a plan to start a company, she most likely would have outlined exactly what she ended up doing.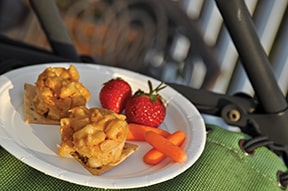
But Shepard didn’t go to business school, and every step she’s taken to build her business – from due diligence about the market to the viability of manufacturing – has been driven by personal passion, literally, a desire to feed herself. “I am my market,” says the 42-year-old mother of two, who was diagnosed with celiac disease more than two decades ago.
Since the day that the chronic discomfort that had plagued her for much of her adult life was finally given a name, Shepard has transformed her cupboards – and her life. In the process, she has built a successful business devoted to ensuring that those with a range of gluten sensitivities, from allergies to the serious autoimmune condition of celiac disease can enjoy their favorite foods.
Her Columbia-based company, Jules Gluten Free, manufactures gluten-free products ranging from basic white flour to cake, bread and brownie mixes. There are even gluten-free cornmeal and oatmeal, products that don’t necessarily contain gluten, but can be contaminated when packaged in a plant shared with wheat-based products.
Think of all the foods you eat on a daily basis that contain wheat: breakfast pastries to pasta, baguettes to beer. Gluten is also an ingredient in a range of products where you’d least expect it – including lipstick and some processed ice cream. When people are 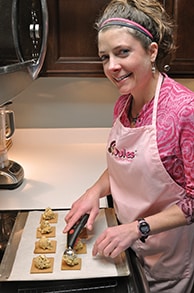 told they have to eliminate wheat in their diets, says Shepard, recalling her own experience, “they can feel deprived” – and worse: “If the food they’re allowed to eat isn’t tasty, they may not want to socialize and will miss out on the fellowship of eating with friends and family.”
Shepard was working as a prosecutor in West Virginia in 1999 when she learned that a decade of cramps, bloating and irritable bowels was due to celiac disease. “I’d be bloated, wearing a suit for court,” she says of the unpredictable condition. “It was my reality.”
But along with the relief of the diagnosis came dismay. “All I ate at the time was pasta and bread,” she recalls. She had baked her way through law school, selling cookies and pastries at the student café. “Baking was a big part of my life.” But after the diagnosis, she says, “I lost the joy in baking, so stopped altogether.”
After moving to Maryland, Shepard took time off from work to care for her infant son and began to experiment with gluten-free flour concoctions. “I was in the kitchen every day,” she says. “I decided I needed to figure this thing out.”
Most of the existing gluten-free recipes for baked goods called for several different flours and leavening agents to achieve texture and ensure rising, Shepard recalls. She worked on a flour mix using various combinations of potato starch, corn flour, rice flour, tapioca and xantham gum until she found a blend that worked, and didn’t need to be refrigerated. She compares the mixture to the “scoop and go” white stuff in many bakers’ cabinets.
During that time, Shepard sought out others with celiac disease and learned everything she could about the condition. She started baking gluten-free desserts for Roots Market in Clarksville and then began offering cooking classes at the natural foods grocery. She self-published a book of recipes, Nearly Normal Cooking, which contained a recipe for her gluten-free flour mix, but soon readers began asking for a pre-mixed bag of the stuff. “I didn’t know anything about manufacturing, but I heard from a ton of people, ‘we love your flour; we don’t want to have to make it.'” With the help of the Gluten Intolerance Group of North America, Shepard identified a plant in Iowa that could handle the sensitive task of “co-packing” without contamination from other food products.
She also got to know Dr. Alessio Fasano, medical director of the Center for Celiac Research at the University of Maryland and a renowned expert on gluten-related disorders. Fasano wrote the introduction to Shepard’s book “The First Year: Celiac Disease and Living Gluten Free” (Da Capo, 2008), and Shepard contributed a chapter to an upcoming book by Dr. Fasano.
Shepard has since been involved in lobbying, starting a website, 1in133. org – named for the percentage of Americans with gluten sensitivities – to advocate accurate labeling on gluten-free products. In 2011, the group built “the largest gluten-free cake in the world,” says Shepard, as part of a gluten-free labeling summit in Washington, D.C.
When she was diagnosed with celiac, Shepard says, she “didn’t know another soul” with the disease. Finally, she met a woman in a mother’s group with the condition, and began bringing her gluten-free baked goods. “She told me I changed her life,” Shepard laughs. Since then, the community has grown exponentially. As awareness of celiac has increased, so has the number of people diagnosed – currently about 3 million people in the U.S.
At the same time, Fasano and fellow scientists have identified a range of gluten-related conditions, from allergic reactions to autoimmune disorders. And then there are the 20 million-plus Americans, “who have no medical necessity to be on gluten-free diet,” says Fasano. “We’ve gone from one extreme to the other.”
And this has certainly been a boon to Jules Gluten Free. While she won’t discuss specific numbers, Shepard says her privately owned company has grown by about 30-40 percent annually for the last few years. Even so, she isn’t interested in riding the wave created by celebrities like Miley Cyrus and Gwyneth Paltrow who have embraced gluten-free diets without medical indication. “I’m tailoring my market to the people who really need it,” she says. “If Miley Cyrus wants a gluten-free Twix bar, I’m not going to jump through hoops for her.”
While Jules’ flour is sold at Roots, David’s and Mom’s markets, few other grocery stores carry it, mainly because Shepard doesn’t work with distributors – a structure that would raise her prices. A five-pound bag of Jules’ flour is upwards of $20 in those stores, and goes for $19.95 on the company website– though the julesglutenfree.com site has frequent specials for bulk purchase and combination packs.
Today we’re in Shepard’s kitchen, where she’s preparing picnic food for folks with a range of allergies. She’s making vegan mac n’ cheese cups, an Italian panzanella salad with hardened chunks of leftover gluten-free bread, and gluten-free graham crackers that will become s’mores cookies. The menu is for an article Shepard is writing for the magazine “Living Without” accompanied by photographs by her partner, Jeff Rasmussen.
While Shepard is busy – running a company, writing and blogging, lobbying, creating podcasts and radio shows, and traveling around the country for lectures and guest appearances – this is the kind of thing she loves to do. She recently made the mac n’ cheese cups for a cooking class with parents of autistic children. (evidence has indicated that symptoms of autism improve with wheat- and casein-free diets.) And a week ago, she brought gluten-free cookies into her daughter’s school for the handful of children who were normally forbidden to share in classmates’ birthday goodies. “They got to eat what everyone else was eating,” she says. “That’s an experience they don’t get to have very often.” *
An Allergy-Free Picnic from Jules Shepard
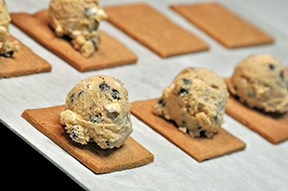
Gluten-free S’mores Cookies
Ingredients:
-
-
- Chocolate Chip Cookie
- Dough (made with Jules Gluten-Free flour), chilled

- Baked Graham Crackers (recipe at right)
- Chocolate squares (e.g. Enjoy Life® Mega Chunks – allergen-free)
-
Directions:
Preheat oven to 350° F for static ovens, 300° F for convection.
Line cookie sheets with parchment paper.
Place graham crackers on lined cookie sheets, spaced one inch apart. Scoop rounded tablespoons of chilled cookie dough onto each graham cracker.
Bake for 7 minutes, then lay a chocolate piece on top of each cookie. Return to the oven for another 2-3 minutes. Remove when the chocolate chip cookies are still soft and only lightly browned around the edges so they will stay chewy.
Makes approximately 60 S’mores Cookies.
_____________________________________________________________
Gluten-free Graham Cracker Cookie Recipe
Ingredients:
-
-
- 3/4 cup shortening or butter (e.g. Earth Balance® Shortening or Buttery Sticks)
- 1/4 cup agave nectar or honey
- 1 cup brown sugar
- 1 tsp. pure vanilla extract
- 1 1/2 cups Jules Gluten Free ™ All-Purpose Flour (203 gr)
- 1 cup white rice flour (135 gr)
- 1/2 cup buckwheat or brown rice flour (67 gr)
- dash of salt
- 2 tsp. cinnamon
- 3 tsp. gluten-free baking powder
- 1/2 cup cold water
-
Directions:
Beat together the first four ingredients in one large bowl and mix remaining dry ingredients in another bowl. Slowly stir the dry mixture into the first bowl, adding water as necessary to create the consistency to make a ball with the dough.
Divide the dough in half, cover and refrigerate or freeze for at least two hours or until very cold.
Preheat oven to 325° F (300° F for convection).
Roll one half of dough onto silicone baking mat or parchment paper dusted dusted with corn or potato starch. Roll to a large 1/8 – 1/4 inch thick rectangle. Roll to preferred thickness: the thinner the dough, the crispier the cookie.
Using a pastry cutter or knife, cut dough to form rectangles to the size you would like for your s’mores cookies. Slide a cookie sheet under the mat or parchment paper to bake the entire sheet of crackers. Prick each cracker with a fork in rows. Repeat with remaining dough.
Bake for 20-30 minutes, or until they are lightly browned. Allow to cool on the baking sheet 5 minutes before transferring to a cooling rack.
Yield: 100 – 125 crackers, depending on size.
_____________________________________________________________
Fresh Spring Rolls with Grilled Tofu
These rolls are as fresh as summer itself, soft and easy to hold, filled with crunchy cucumber and carrots, punctuated by fresh mint and basil. Fill with whatever you happen to like to make them just right for you and your family.
Ingredients: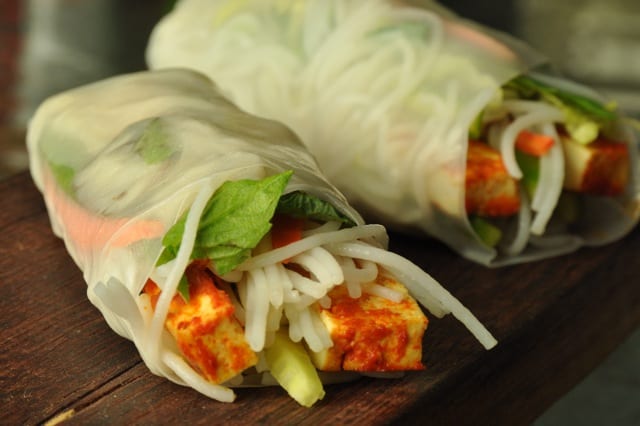
-
-
- 14 oz. extra-firm tofu (or other protein like
- chicken or shrimp)
- 1/4 cup Sriracha Hot Chili Sauce
- 1/4 cup kefir or cultured coconut
- milk (So Delicious® Cultured Coconut Milk yogurt beverage)
- 2 carrots
- 2 small cucumbers
- 4 shitake mushrooms
- 1 cup shredded lettuce
- Fresh mint leaves
- Fresh Thai basil leaves
- 1 package rice vermicelli noodles
- 1 package rice papers
-
Directions for Tofu:
Wrap tofu in paper towels and press between heavy plates; replace the paper towels and press again, as needed, pressing for 30 minutes to drain. Cut pressed tofu into 6 strips, approximately 1/4″ thick.
Combine the Sriracha with the kefir in a small bowl. Pour half this mixture into the bottom of a bowl, line with tofu strips, and pour remaining mixture over top of the tofu, covering all sides with marinade by rolling the strips in the sauce. Cover and refrigerate for at least 1 hour, or overnight.
Grill: Once marinated, spray a grill well with oil and preheat to medium hot. Lay marinated tofu strips directly onto the hot grill. Brush the tops with leftover marinade, if necessary, to keep them moist. Grill until golden brown on the bottom with grill marks; flip to cook on the other side and brush other side with more marinade, if necessary.
Pan Fry: In the alternative, pan fry the tofu strips in a non-stick pan or in a regular pan with 1 tablespoon of oil. Turn to fry both sides once lightly browned, approximately 5 minutes per side on medium-high heat.
Once cooled, cut each slice lengthwise again, into 3-4 strips.
Directions for Rolls:
Prepare rice vermicelli according to package directions. Rinse and drain, then cut into 3 inch long lengths.
If the shitake mushrooms are dried, soak them in water for 15 minutes. Boil the soaked or fresh mushrooms in a large pot of water for 5 minutes, then dice.
Cut cucumbers and carrots into very thin strips, approximately 3 inches long.
Fill a flat bottomed pan with very warm water. Dip the rice papers, one at a time, into the water, soaking for 5 seconds, or until totally soft and pliable. Try not to let the paper wrinkle, so use a pan with a large enough bottom that the paper can lay flat while soaking.
Gently remove the paper to a plate and spread flat. Imagine the paper circle as a clock face. At 12 o’clock on the top of the paper circle, vertically lay a small amount of cut vermicelli noodles, mint and basil leaves, lettuce, mushrooms, cucumbers, carrots and 2-3 strips of tofu, then repeat with other ingredients on top of the tofu. Pick up the paper at 6 o’clock and bring it up towards 12 o’clock, laying it on top of the layers of ingredients, then take the paper at 9 o’clock and wrap it tightly around the ingredients. Roll up the wrap all the way to 3 o’clock. The rice paper will stick to itself in this tight roll shape and is ready to serve.
Makes 8-10 rolls.
_____________________________________________________________
Vegan Mac n’ Cheese Cups
What could possibly make mac n’ cheese more fun? Making it as bite-sized poppers! This healthier version of the kid favorite will make the grown-ups happy too. Vegan, gluten-free, and full of hidden vegetables and healthy ingredients, your family will love this new picnic favorite!
Ingredients:
-
-
- 2 white potatoes (.5 lbs), peeled and diced
- 1 carrot (.2 lbs), peeled and diced
- 1/2 cup onion, diced
- 1 Tbs. olive oil
- 1/2 cup water
- 1/4 cup cashew or almond butter or sunflower nut
- butter
- 1 tsp. salt
- 1/2 tsp. minced garlic
- 1/3 cup vegetable oil of choice
- 1/2 tsp. Dijon or spicy brown Mustard
- 1/4 tsp. yellow mustard powder
- 1 Tbs. lemon juice
- 2 tsp. nutritional yeast (optional, but adds great
- nutrition & taste)
- 1/4 tsp. cayenne pepper
- Dash of black pepper
- gluten-free macaroni noodles
-
Directions:
Prepare the gluten-free macaroni noodles according to package directions. Rinse with cool water and drain.
In a large non-stick skillet, cook the potatoes, carrot and onion in olive oil and 1/4 cup water. Cover and cook over medium heat, stirring occasionally. Add 1/4 cup additional water as the vegetables cook, as needed to keep them from drying out. Once they are fork tender, transfer to a blender or food processor and pulse until smooth.
Add nut or sunflower butter, salt, garlic, oil, mustard and dried mustard, lemon juice, nutritional yeast and peppers. Pulse until fully integrated. Taste and add more of any particular ingredient to adjust taste to your preference. Thin with hot water, as and only if necessary. Stir in the cooked macaroni noodles.
Brush four 12-cup, nonstick mini muffin tins with butter or non-dairy alternative, taking care to cover the entire baking surface well. Spoon macaroni and cheese mixture into the prepared muffin cups, packing them in a bit to compress. Sprinkle extra nutritional yeast on top, if desired.
Bake for 10 minutes, or until sizzling. Allow to cool for 5 minutes, then go around the outside of each cup with a knife to loosen it from the pan. Remove with a spoon or rubber spatula to serve.
NOTE: This vegan cheesy sauce is also great as a nacho cheese for chips or dip! Thin the sauce with hot water until it is the consistency you desire. Enjoy!
_____________________________________________________________
Italian Panzanella Salad
If you have any gluten-free bread left overs, there are loads of fun things you can do to “re-purpose” your delicious homemade gluten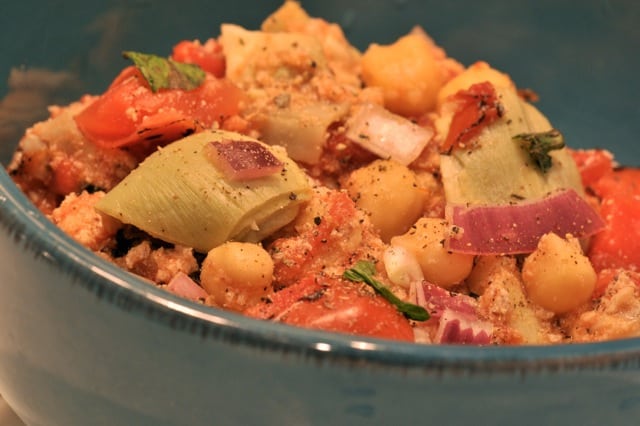 -free breads so that you don’t waste one precious slice! (This recipe also works with stale pre-packaged gluten-free breads).
Here’s a fun recipe – one of those “empty your pantry” kind of things where you can get inspired and just start embellishing! Panzanella is a traditional “bread salad” hailing from Tuscany, where the peasants used every last morsel by soaking it and adding in fresh local vegetables.
In this incarnation, I used slices of homemade gluten-free white bread and homemade gluten-free beer bread … just to mix it up … adding farmers’ market tomatoes and red onion, fresh basil, chickpeas, artichoke hearts, wine vinegar, extra virgin olive oil, fresh squeezed lime juice … hungry yet?! Leave no crumb behind!
Ingredients:
-
-
- 3 cups stale (or previously frozen) gluten-free bread (approximately 8 slices)
- 4 large diced tomatoes (or two 14. oz. cans – preferably oven-roasted)
- 1/3 red onion, diced
- 1 artichoke (or 1 can artichoke hearts 14 oz.), chopped
- 1 Tbs. fresh basil, chopped
- 1cup chickpeas (1/2 can)
- 2 1/2 Tbs. lime juice (approximately 1/2 lime)
- 2 Tbs. extra virgin olive oil
- 2 Tbs. red or white wine vinegar
- 1 tsp. black truffle oil (optional)
- sea salt and black pepper, to taste
-
Directions:
Thickly slice previously frozen or stale gluten-free bread. Cut each slice in half and soak all slices in a large bowl of cold water for 30 – 45 minutes.
Meanwhile, dice the tomatoes and onion, chop the artichokes and basil, rinse the chickpeas and measure out liquid ingredients. Mix all together in a large bowl and set aside.
After bread has soaked, squeeze the water out and add it to the bowl with the dressed vegetables. Toss all together until it is the consistency you prefer (the more tossing/stirring, the less defined any chunk of bread will remain). Chill at least two hours, or ideally overnight, before serving.
_____________________________________________________________
Pie Pops
The theme with any picnic should be easy to eat foods. Pies are great picnic fare, but serving and eating a slice of pie isn’t always easy! Instead of fussing over paper plates, forks, pie lifters and napkins, make these simple pie pops for a grab and go treat!
Ingredients:
Dough:
-
-
- 1 cup Jules Gluten Free™ All-Purpose Flour (135 gr)
- 1/2 teaspoon salt
- 2 Tbs. shortening, butter or non-dairy alternative (e.g. Earth Balance® Shortening Sticks)
- 3 Tbs. butter or non-dairy alternative ( e.g. Earth Balance® Buttery Sticks)
- 2 – 3 tablespoons cold water OR 1 1/2 Tbs. vodka + 2-3 Tbs. cold water milk (dairy or non-dairy) for brushing on crust tongue depressors/popsicle sticks
- Demerara sugar to sprinkle on the pops
-
Apple Pie Filling:
-
-
- 2-3 crisp apples, cored, peeled and sliced (approximately 2 cups)
- 1/8 cup granulated cane sugar
- 1 tsp. cinnamon
- 1/8 tsp. salt
- 1 tsp. apple cider vinegar OR lemon juice (plus more for soaking apples)
-
Directions:
Dough:
In a large bowl, whisk together the dry ingredients. Cut in the shortening and butter using a pastry cutter (or the flat paddle attachment on a stand mixer or a food processor). Add the vodka/water gradually to make the consistency you need to form a ball – err on the side of it being wetter rather than crumbly, but it should not be sticky. Form a disc with the dough, wrap in plastic and set aside on the counter for 30 minutes while you make the filling.
Filling:
Peel, core and slice apples. While you are slicing the apples, put cut apples in a bowl with cold water and 1 tablespoon of lemon juice or cider vinegar to keep the slices from turning brown while slicing the rest of the apples.
Drain the apples and toss with the remaining ingredients. Set aside to help juices form while rolling out the crust.
Making the Pies:
Prepare two cookie sheets by lining with parchment paper, and gather large — 4 inch — round cookie cutters or a pastry cutter to manually cut circles out of the dough. Preheat oven to 375° F.
Dust a clean counter or pastry mat and rolling pin with cornstarch or potato starch. Roll dough to a thickness of 1/8 – 1/4 inch.
Using the large cookie cutter, cut shapes from rolled out dough (2 same-size shapes for each pie pop). Add scraps together to roll out again for more circles. For each pie pop, you should have two matching cut-out pieces of dough.
Place a dollop of fruit filling in the center of one from each pair of cut out dough shapes. Allow 1/2 inch border between the filling and the edge to allow for sealing with top piece. Dampen the border of dough with a moist finger and lay a matching piece of dough on top, pressing down on the center gently with the palm of your hand, and pressing the edges together gently to seal.
Lay each mini pie onto the prepared cookie sheets and brush with milk of choice. Sprinkle Demerara (or other granulated) sugar on tops and cut a small slit or two in the top of each pie to allow steam to escape during baking.
Bake in preheated oven for 10 minutes. Remove to cool before making pops.
To make the pops, gently insert a tongue depressor or popsicle stick into the seam between the two pressed pieces of dough. Insert 1-2 inches, or until stable.
Makes approximately 6 pie pops.